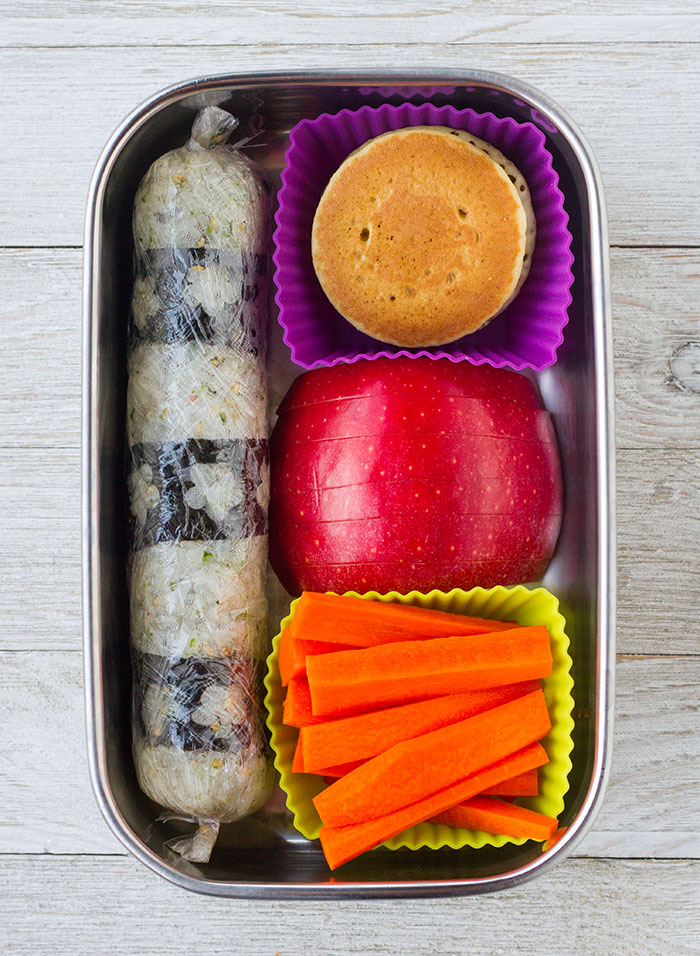
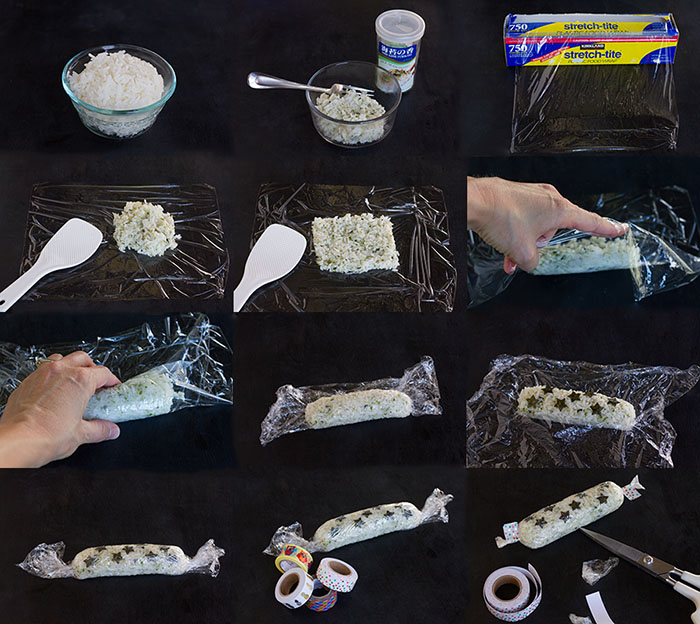
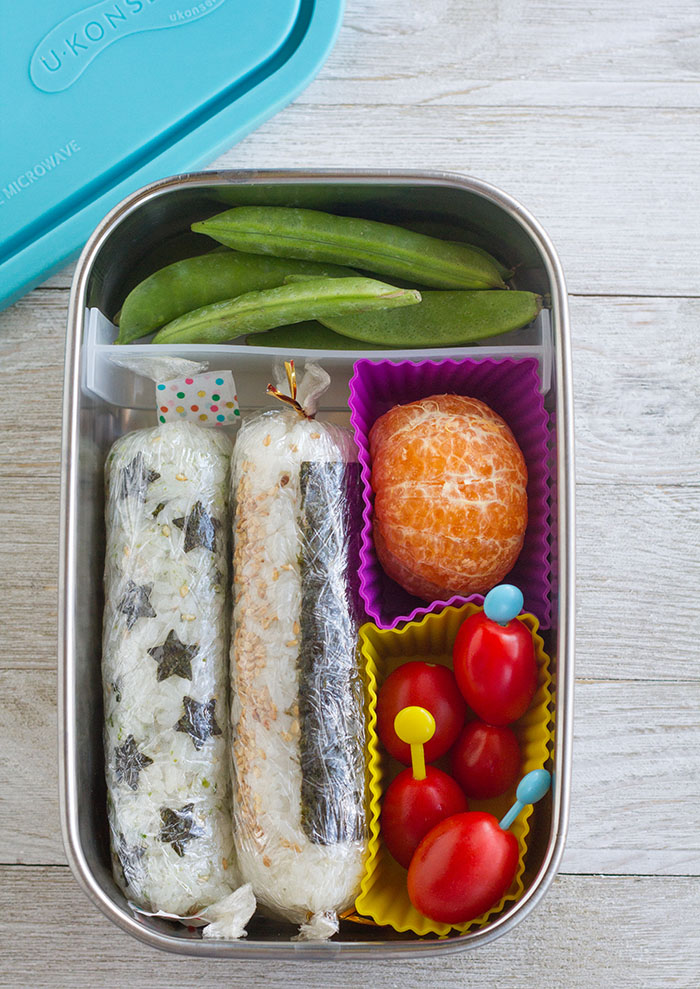
The new favorite form of onigiri (Japanese rice ball) at our house is stick onigiri. It’s very popular in Japan right now too, and it’s no wonder, because it’s fun! The onigiri is formed into a stick shape instead of a ball, triangle, etc. The easiest technique is a bit different too. It’s a bit like making sushi—spreading the rice into a rectangle on a piece of plastic wrap, adding any desired filling then lifting the edge of the plastic wrap up so that the rice folds over and you can gently press it into a stick shape.
If you add a filling, just make sure to leave about a 1/2-inch on other side free from filling so that it doesn’t squeeze out the ends.
Part of what makes them fun is decorating them. Your imagination is the limit! They’re easy to pack in a bento and they’re also fun to eat. Just untwist one end and take a bite!
 Print This Recipe
Stick Onigiri
Makes 1 stick onigiri
Ingredients:
1/2 cup hot, steamed Japanese medium grain rice
Pinch of fine grain sea salt
Filling: if using a filling, use about 1 tablespoon
Other: any other seasonings or toppings you want to use
Directions:
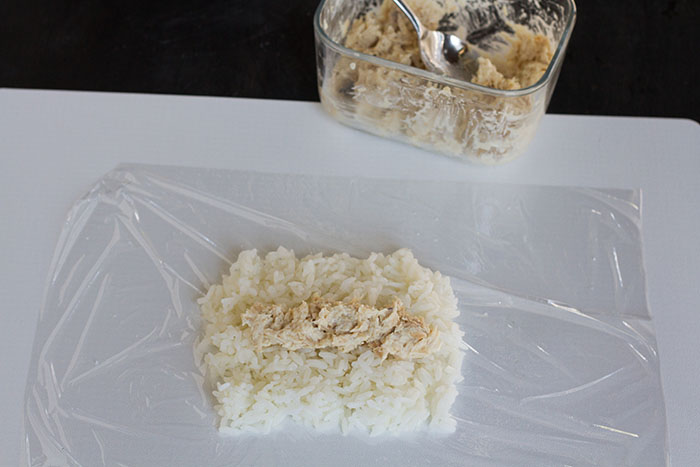
1. Place a sheet of plastic wrap on a flat, clean surface. Sprinkle the sea salt over the rice and gently toss the rice to combine. If you are going to add anything else to the rice, like sesame seeds or furikake, toss it into the rice as well.
2. Spread the rice into a small rectangle (about 3 3/4-inches by 4 1/2-inches) in the middle of the plastic wrap, long edge facing you. I like to use a rice paddle, but you can use your hands. If you use your hands, it’s best to keep them moist, so that the rice doesn’t stick to them! Gently pat the rice down.
3. If you are going to add a filling, arrange it in a line across the middle, but leave 1/2-inch at the ends free of filling, so it doesn’t squeeze out…we’re not making sushi!
4. Grab the edge of the plastic wrap closest to you (two hands are better than one…but I had one hand occupied taking pictures!) and gently lift it up so that the bottom edge of the rice rectangle starts to fold over. Push the plastic wrap forward until it is completely around the rice and the rice begins to fold into a log shape. Use your hands to gently press the rice into a log…but don’t squeeze too hard. You don’t want to create mushy rice!
5. If you are going to add anything to the outside of the stick onigiri, carefully open the plastic wrap and add it now. If you are adding any nori, make sure you place it on the rice rough side down. Once finished, carefully roll the stick onigiri back up in the plastic wrap.
6. Twist the ends of the plastic wrap tightly, then use a piece of string, a twisty tie, or a piece of washi tape to seal them close so they won’t untwist. Trim the ends of the plastic wrap. You’re done!


{ 3 comments… read them below or add one }
This looks fascinating. I can’t even imagine how cool it would be as a kid in school to open this lunch box up in the cafeteria! My only question is…how do you eat it? Do you slice it like sushi? Or push it out one end? People in Missouri want to know! :)
Thanks Marly! You just unwrap one end and take a bite! (Continue unwrapping as you go of course…I’ve had personal experience with taking a bit of plastic wrap and I don’t recommend it.)
I’m making this for lunch tomorrow – can’ wait! Thanks for the great idea, Rachael!